

Long time no see all,
Some of you may remember me from about two years ago, I built the silver CX500 cafe and was working on a 1970 CL100 race/cafe thing. Needless to say I had to put it on hold for a while because of the Army.
Long story short, I returned back to Texas from Afghanistan in mid December and knew I wanted to buy another bike. I had my eye out for a sportclassic... but I saw this baby on craigslist and knew I had to get it.
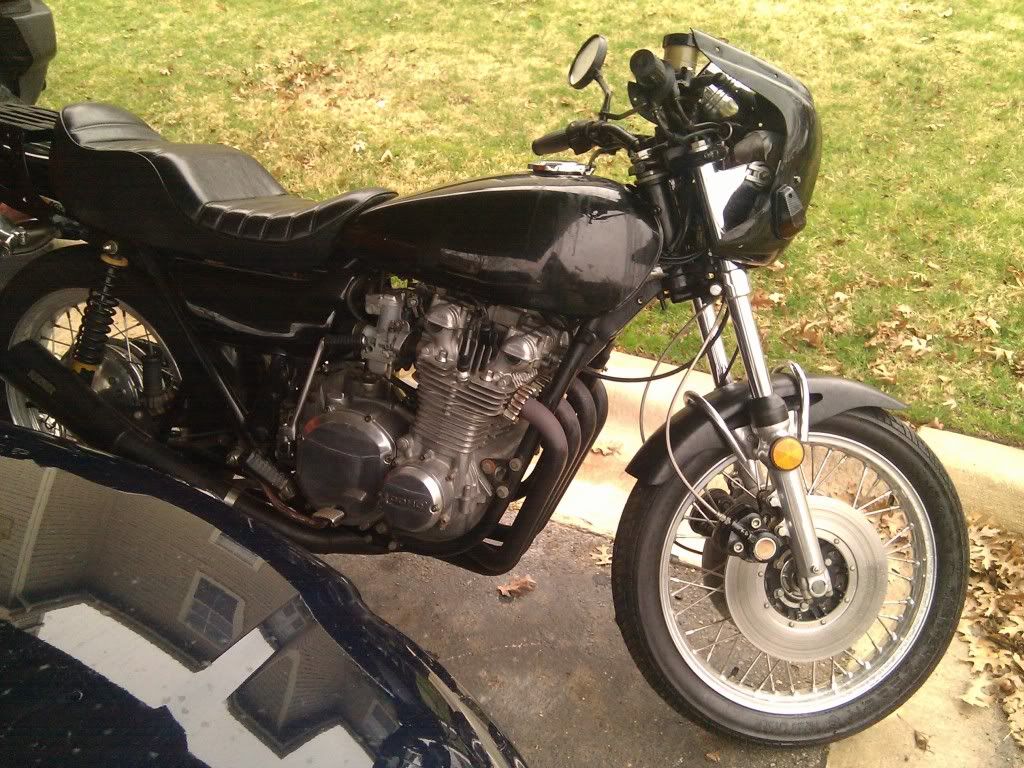
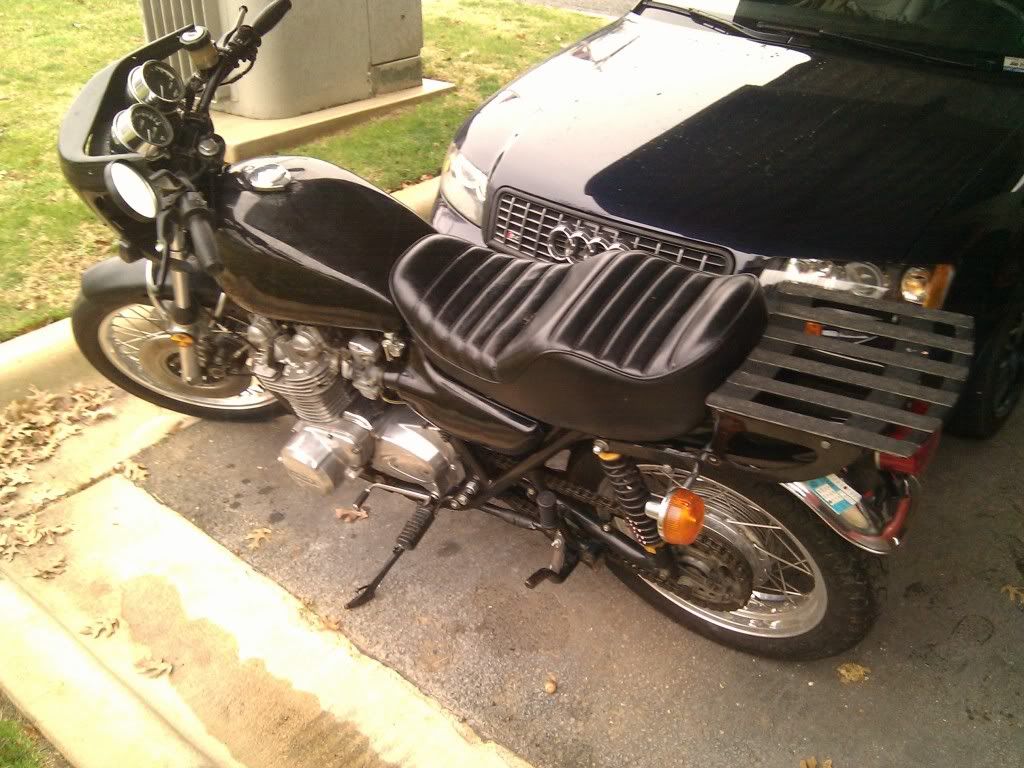
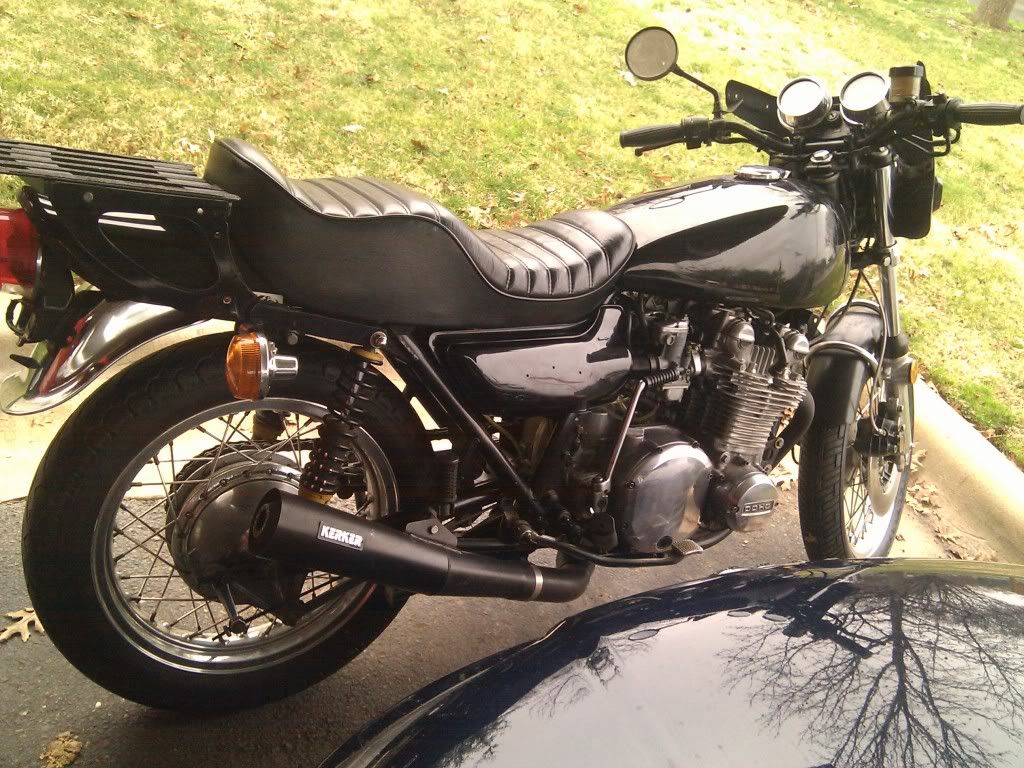
Basically, this Z1 has been bouncing around between two brothers and a son since it was first bought. Between the three of them they've done several great modifications to the bike.
For about $3,000 I got a running 30,000 mi Z1 with:
-Dual front disk conversion with braided steel brake lines
-Rebuilt front forks (with aftermarket damper rods)
-Rebuilt wheels with Alloy rims (I think DID Japan)
-S&W rear springs
-Full Dyna makeover
-Fresh clutch
-New Carb boots and balanced and rebuilt carbs
-Needle bearings in tree and swingarm
-Kerker exhaust
There's other things I'm probably forgetting, but as you can see... an amazing starting point.
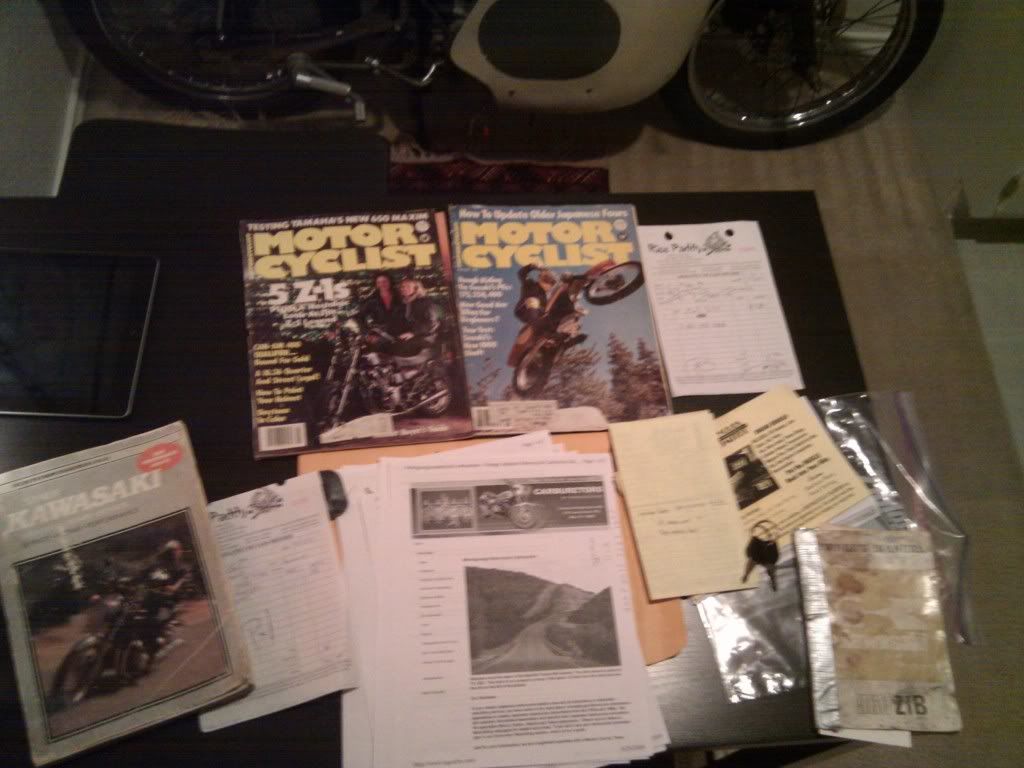
They also have a clymers, original manual, tool kit, and two magazines from 1980 talking about good mods for the Z1 as well as a bunch of receipts from parts and research they had done on tuning the bike.
![Image]()
![Image]()
![Image]()
![Image]()
So with a bike this mint I'm only buying the best stuff I can. So far I've gathered airtech clipons and bullet blinkers, generic headlight ears (until I get around to ordering the k2 half fairing from Airtech), Tarozzi Rearsets, bar end mirrors, and a second set of full bodywork to paint.
![Image]()
So obviously my first steps are to get the front brakes working (they got stuck from the bike sitting in the guys garage for a while), new tires, chain, and put on the stock Z1 seat I have. luckily I don't have to worry about the oil because the seller changed the oil and filter last week.
Stay tuned for the next episode!
If anyone has any thoughts, ideas, or suggestions, I'm open to them. I've never touched a Z1 before so I've been lurking the kzr forums and doing as much research as I can before doing anything.
PS: if anyone has a rickman frame for sale...
Some of you may remember me from about two years ago, I built the silver CX500 cafe and was working on a 1970 CL100 race/cafe thing. Needless to say I had to put it on hold for a while because of the Army.
Long story short, I returned back to Texas from Afghanistan in mid December and knew I wanted to buy another bike. I had my eye out for a sportclassic... but I saw this baby on craigslist and knew I had to get it.
Basically, this Z1 has been bouncing around between two brothers and a son since it was first bought. Between the three of them they've done several great modifications to the bike.
For about $3,000 I got a running 30,000 mi Z1 with:
-Dual front disk conversion with braided steel brake lines
-Rebuilt front forks (with aftermarket damper rods)
-Rebuilt wheels with Alloy rims (I think DID Japan)
-S&W rear springs
-Full Dyna makeover
-Fresh clutch
-New Carb boots and balanced and rebuilt carbs
-Needle bearings in tree and swingarm
-Kerker exhaust
There's other things I'm probably forgetting, but as you can see... an amazing starting point.
They also have a clymers, original manual, tool kit, and two magazines from 1980 talking about good mods for the Z1 as well as a bunch of receipts from parts and research they had done on tuning the bike.
So with a bike this mint I'm only buying the best stuff I can. So far I've gathered airtech clipons and bullet blinkers, generic headlight ears (until I get around to ordering the k2 half fairing from Airtech), Tarozzi Rearsets, bar end mirrors, and a second set of full bodywork to paint.

So obviously my first steps are to get the front brakes working (they got stuck from the bike sitting in the guys garage for a while), new tires, chain, and put on the stock Z1 seat I have. luckily I don't have to worry about the oil because the seller changed the oil and filter last week.
Stay tuned for the next episode!
If anyone has any thoughts, ideas, or suggestions, I'm open to them. I've never touched a Z1 before so I've been lurking the kzr forums and doing as much research as I can before doing anything.
PS: if anyone has a rickman frame for sale...


